Video
Waveforms over Histograms, any day of the week.
When it comes to exposure, there are two mainstream approaches. One can expose to the right, while the other approach allows one to expose for middle grey. Exposing to the right, also known as ETTR, is typically achieved by using a histogram, while exposing for middle grey is better achieved by using a waveform monitor.Histograms
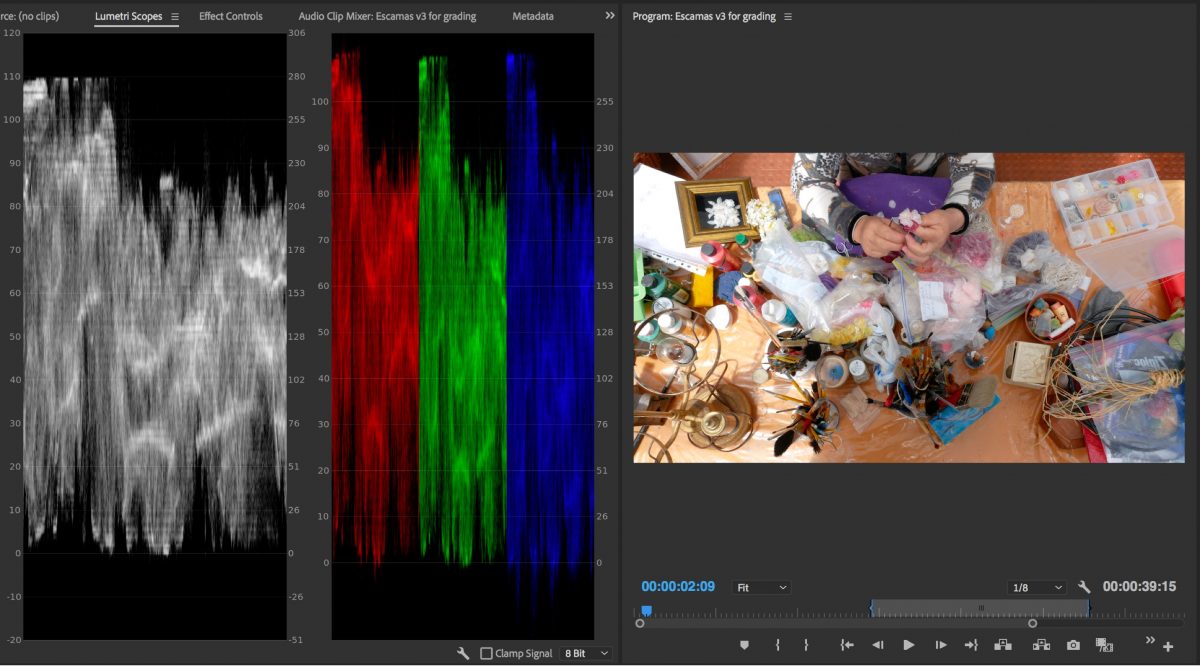
A histogram shows information horizontally, the blackest black on the left, and the brightest white on the right. Using a histogram is a common, and valid, approach for lots of circumstances. My issue with histograms is that they don’t show us WHICH parts of the image are dark or bright, just how much of the whole image is exposed at each value. While the exposure for a certain scene might be correct, the overall exposure most likely would be inconsistent from shot to shot. This might not be an issue while shooting stills, but it can be when shooting video.Waveforms
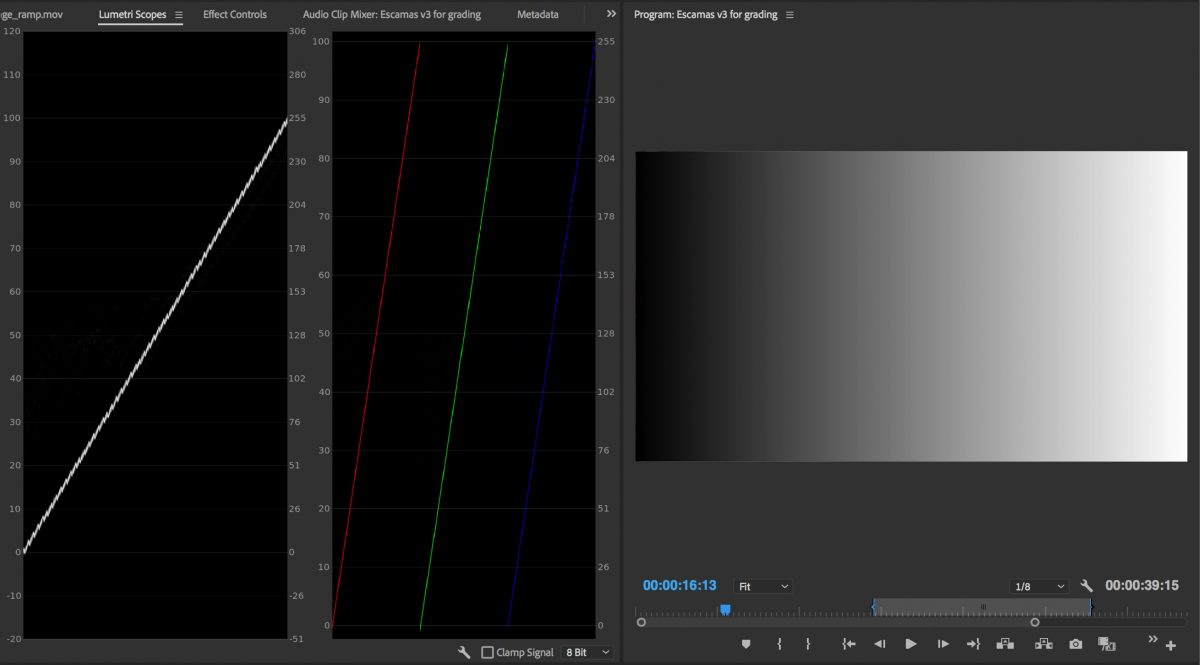
Unlike histograms, waveforms do represent an abstract version of the image. The waveform’s data on the left mirrors exactly what’s on the left of the frame, what’s at the bottom of the waveform mirrors what’s at the bottom of the frame, etc. You can use the tiny monitor on your camera, or you could use a properly calibrated, large and bright external monitor/recorder. Totally up to you. =) Regardless the viewing device, let’s compare a standard “tonal range ramp” on a Histogram and on a Waveform Monitor. Even though the image goes from pure black to pure white (from left to right) the histogram is just showing us the overall exposure. On the contrary, on the waverform monitor, we clearly the tonal range going from 0 to 255.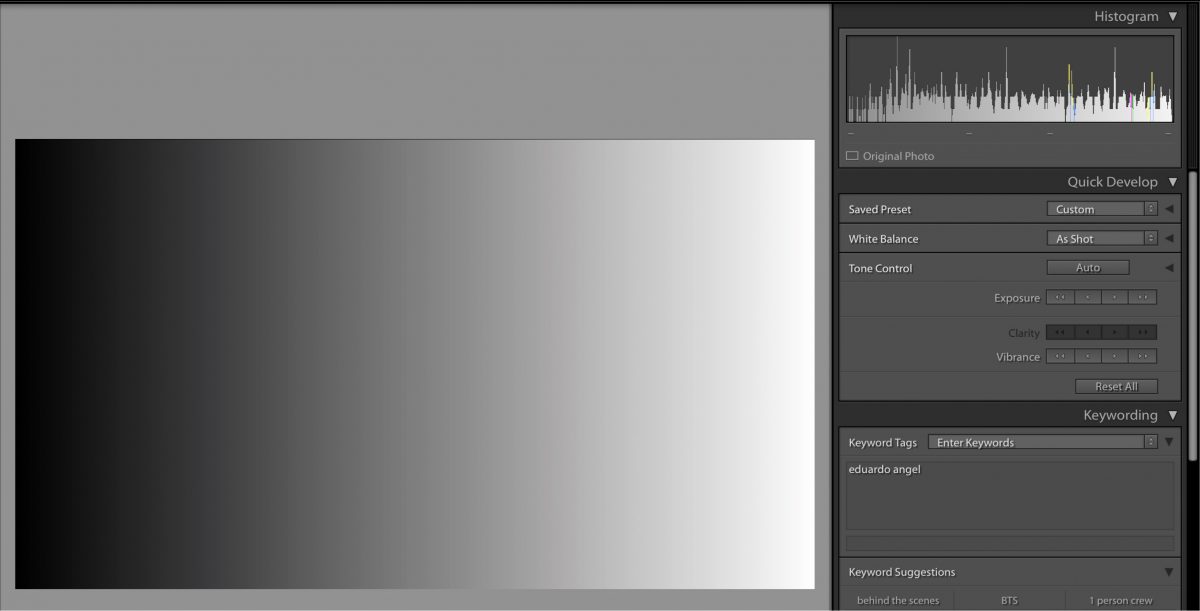

Typical Exposure Recommendations for REC 709
- 100 IRE Highlights
- 70 IRE Caucasian Skin Tones
- 45-55 IRE 18% or Middle Grey
- 0 IRE Blacks
Exposure Recommendations for LOG
- 80 IRE Super White
- 61 IRE White
- 55 IRE Caucasian Skin Tones
- 42 IRE Skin Tones
- 15 IRE the lowest IRE to avoid Noise
- 7.3 Black
Video
The Pros and Cons of external recorders.
I’ve been using an Atomos external monitors/recorders for a while, and while I had very clear reasons to pick up this device, I’ve found many other very valuable and attractive features. Here I share the most interesting ones in no particular order.
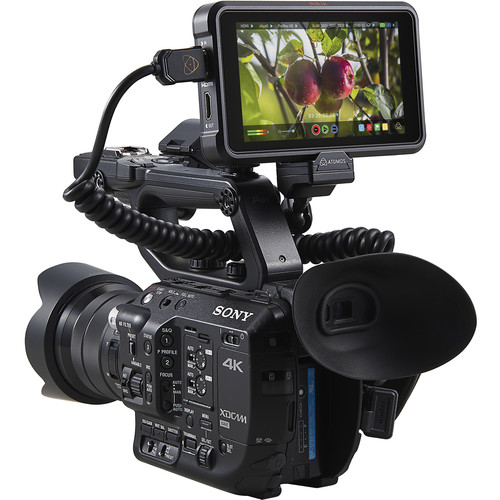
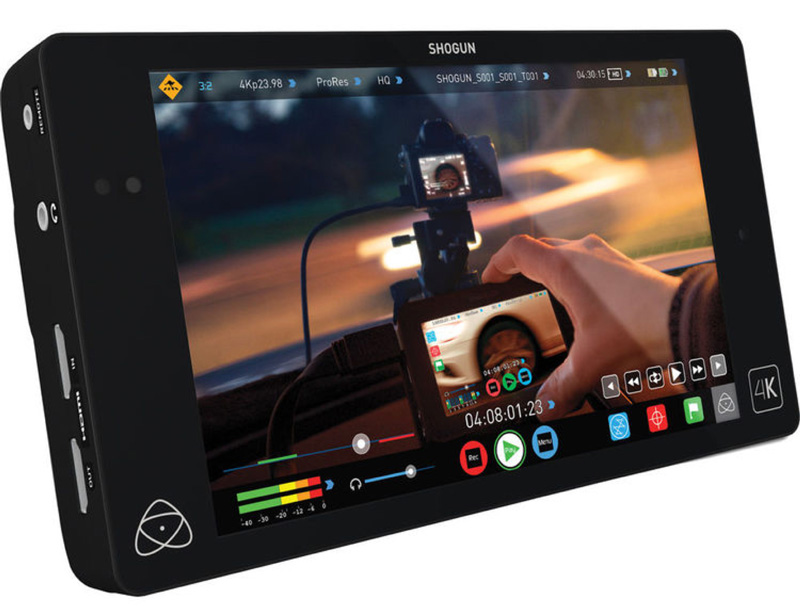
The new Atomos Ninja V
1. Longer recording times
The first and most obvious reason was to record 4K and HD for extended periods of time. The Shogun utilizes 4K HDMI and 12G-SDI inputs to record clean output signals at resolutions up to UHD 4K (3840 x 2160) at 23.98, 24, 25, 29.97, and 30p, as well as Full HD (1920 x 1080) video up to 120 fps with some cameras.
We’ve been shooting a lot of corporate interviews and live events lately and swapping 32GB or 64GB is cumbersome and very inefficient. The additional steps in post to log each and backup each card are fairly simple but time consuming. Yes, SD cards are cheap, with a 64GB costing about $30 (Amazon • B&H) and a 128GB going for about $60 (Amazon • B&H), I was expecting Solid State drives to cost an arm and leg. Wrong!
You can now get an “Atomos approved” (the complete list is available here) SanDisk Pro 240GB drive for only $120 (Amazon • B&H) and a SanDisk Pro 480GB drive for only $200 or less! (Amazon • B&H). Both drives come with an impressive 10-year warranty. And here’s a special Shogun kit that includes TWO 240GB Solid State Drive for FREE. A no brainer if you ask me.
It is worth mentioning that shooting 1080 in ProRes 422 on a 240GB drive (with the Panasonic Lumix GH5 on Amazon • B&H) gives you almost 3.5 hours of recording time. Using the same drive but recording in ProRes LT gives you almost five hours.
The Shogun also allows other systems like Sony’s a7S (Amazon • B&H)that are not capable of recording 4K internally to send the 4K signal to the external device via HDMI.
2. Adding XLR ports to your cameras. No need to sync audio in post.
The first “ah-ha!”moment was recording audio directly into the Shogun via the provided XLR breakout cable (with two 3-pin male and two 3-pin female XLR). The Shogun provides Phantom Power which is essential when using our trusted Rode Lavalier mics (Amazon • B&H).

The Shogun can record 8 channels of digital audio embedded in the HDMI signal and 12 channels of digital audio embedded in the SDI signal. There’s also a 3.5mm output that doubles as a Line Out or Headphone jack. The headphone’s volume can be controlled separately within the menu. Pretty clever!
We have used the Shogun mostly with Sony and Panasonic effectively adding XLR ports to our tiny cameras. This is important: we noticed a delay or off-sync between the footage and the audio being recorded into the Shogun. After extensive tests we also noticed that the audio delay was different for Cam A and Cam B even though both were the same brand and model, and running the same exact firmware version.
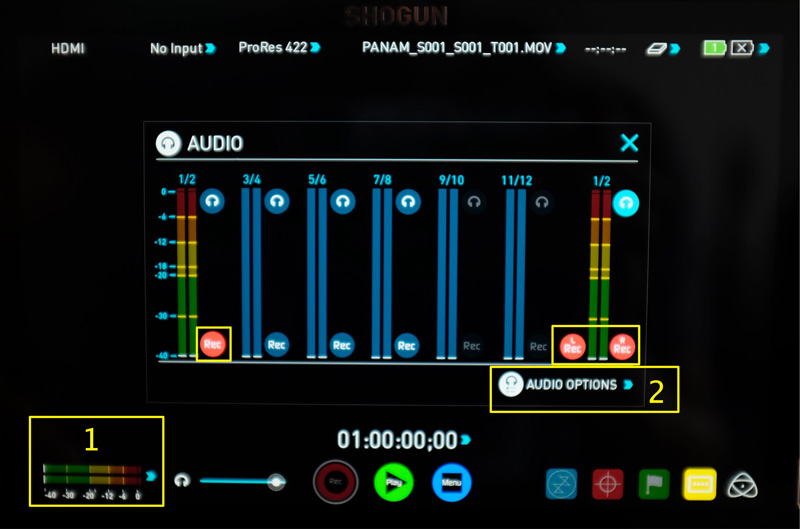
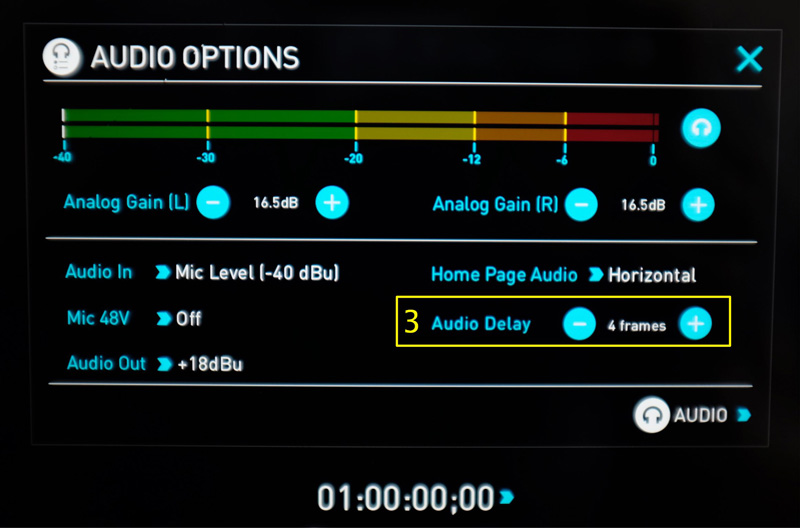
Thankfully Atomos includes a very easy fix; simply go to the Audio menu and from there navigate to the “Audio Options”where you will see an “Audio Delay”preset. We finally settled on 4 frames for the Audio delay.
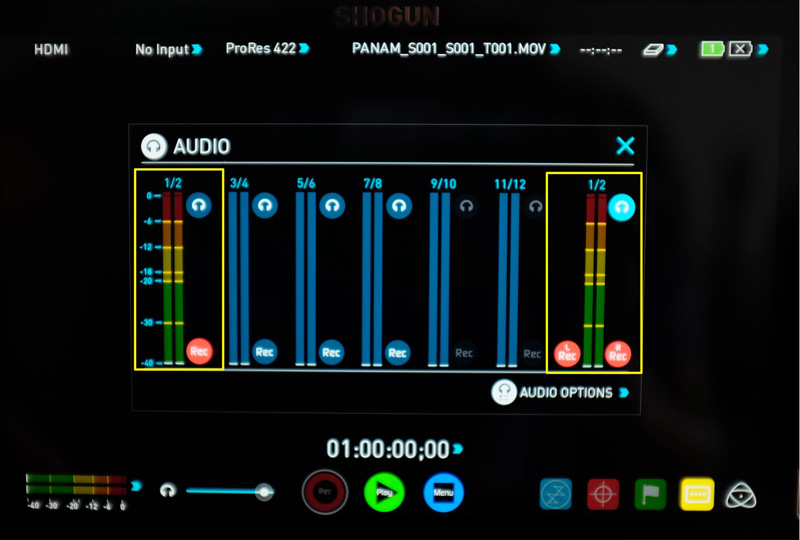
For our one-person interviews and the most recent Lynda.com courses we used one shotgun boom mic on XLR A and a wireless lavalier set on XLR B. This is what the correct settings on the Shogun should look like:
3. Standardizing editing codec and no need to transcode
On most projects we try to use the same camera model. So if we need three cameras we would use three identical brand/models. We try to keep it simple.
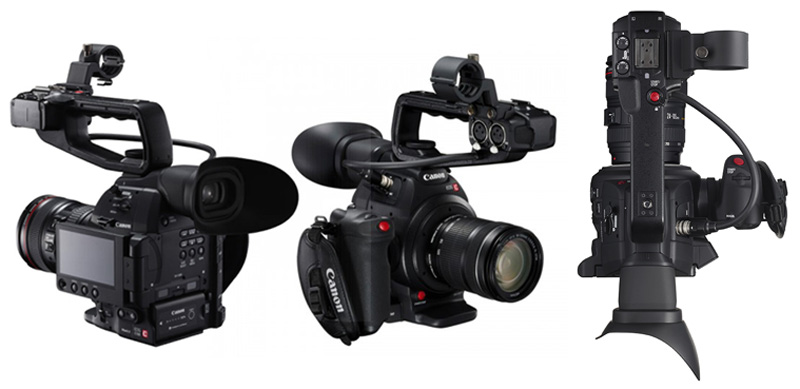
But on a recent shoot in Portland we were shooting with two Canon C200s, had a “behind the scenes”crew using two GH5s, had one Sony A7s doing time-lapses and used one Sony FS7 for some slow-motion sequences. Not the ideal “workflow” situation.
Normally this would be a post-production nightmare for our editor and/or a huge time waste for us having to transcode all that footage every night on-location. We simply attached a Shogun to each camera, shot ProRes 422 with clean audio and the only post step required on our end was backing up the Solid State Drives into our TWO G-Tech drives (Amazon • B&H). Why two? One is set as the Master and at least one as our Backup. When possible, we bring additional Solid State Drives with us so during the shoot we can leave the footage on them as a third backup.
The only disadvantage I see from this approach is the huge file size of the ProRes compared to the native on-camera files, but when taking into account the time wasted transcoding and syncing audio the investment for bigger and faster hard drives more than pays off.
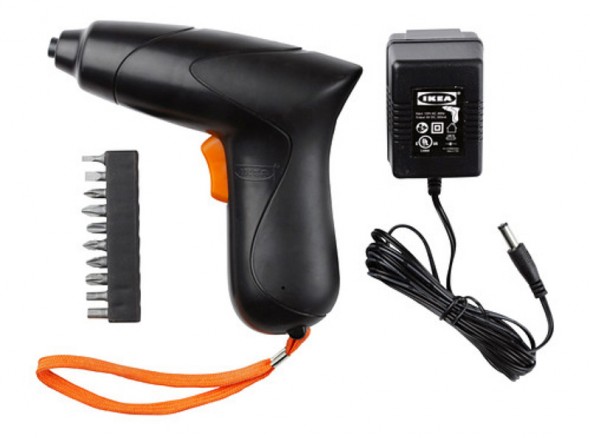
A handy tip: if you will be renting SSDs often, I suggest getting a battery-operated screwdriver to make the process of getting the drives into the Master Caddy II much faster and easier. The best bargain can be found at Ikea.
5. Camera Settings
Here’s something VERY important to consider when using the Shogun with Panasonic cameras.
1. In the camera’s “Motion Picture”Menu, navigate to the fourth screen (as of this writing).
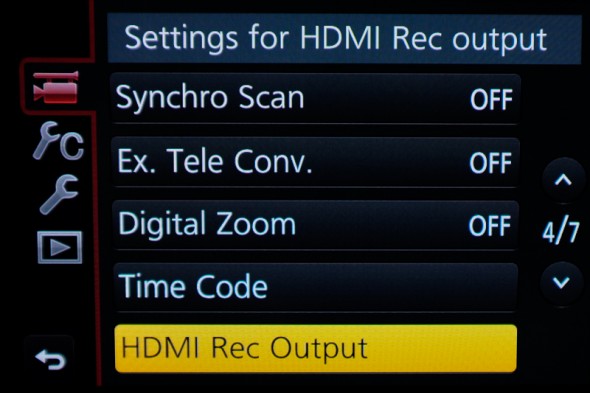
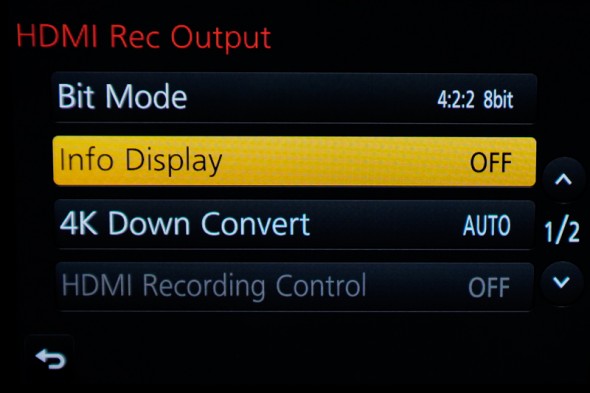
2. Go to “HDMI Rec Output.”If for any reason you are planning to record in 4:2:2 8 bit, make sure to go to “Info Display”and turn it off. Failing to do this will record the camera’s menu into the footage.
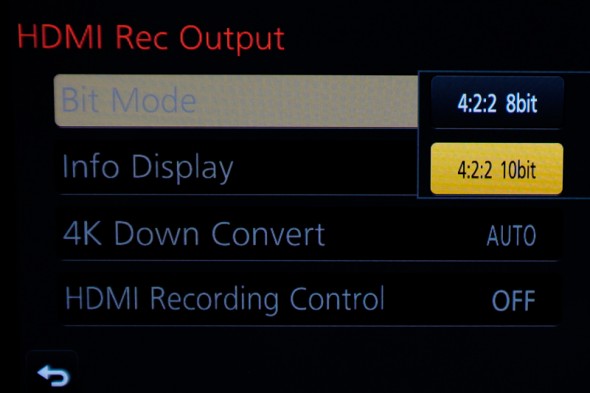
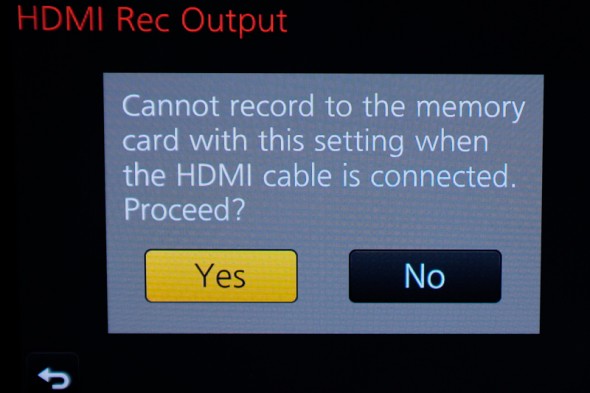
3. If instead you are planning to record in 4:2:2 10 bit, go to “HDMI Rec Output” then “Bit Mode,”select “4:2:2 10 bit”and then “yes.”
6. Focus, Exposure and LUTs
We purchased the Shogun thinking that it would be much easier to monitor focus on a 7”screen. It does work wonderfully in that regard, but we got a lot more than we bargained for. The touchscreen is very minimalist and easy to navigate, the color accuracy is extremely good. Actually, the monitor’s color standard is REC 709 and it can be calibrated with an optional Atomos Spyder.
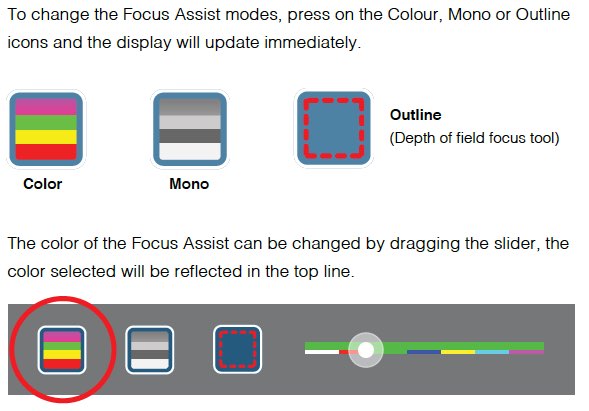
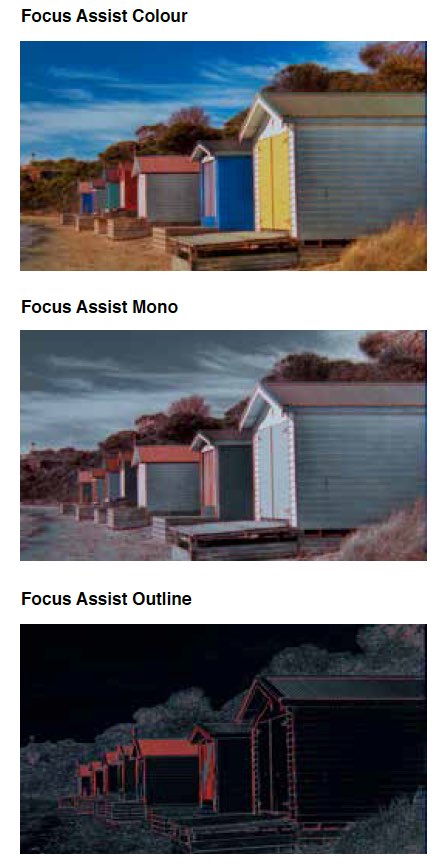
The additional benefit of having more reliable and customizable Focus Peaking is very handy. There are three flavors for peaking: Color, Monochrome, and Outline. In terms of monitoring exposure, especially when shooting outdoors, False Color is key. This feature assigns different colors to areas of different exposure in the image: overexposed areas appear as red, and underexposed appear as blue.
The ability to load LUTs and show the client what the footage will look like after grading is priceless. It is important to know that the LUTs loaded into the Shogun simply previews what the footage would look like, but the media being recorded is not affected. Here’s a short film featuring Panasonic’s recently released Anamorphic mode, and the yet to be released V-Log L gamma file color space.
7. Batteries
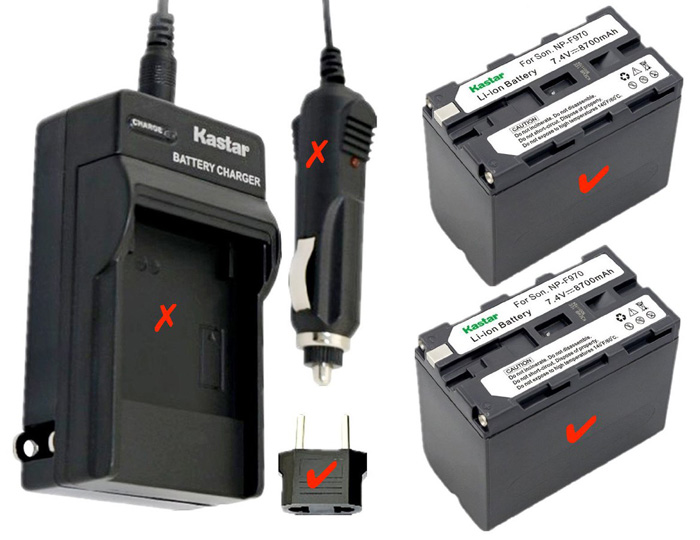
In a nutshell, get plenty of juice. Perhaps the biggest complaint from many users has been regarding battery life.The battery provided with the kit only lasts about 45 minutes, making it mandatory to buy additional ones. We went the “cheapo”route and purchased a too-good-to-be true Kastar kit on Amazon that included two batteries, a charger and a car charger for only $34. Unfortunately this time the “you get what you pay for”maxim held true. The batteries last about the same as an original Sony NP-F970, but the Kastar charger is completely worthless. An original Sony battery costs around $120.
We got stuck on location with a ton of dead batteries and a bad charger. Not a pretty day. The lesson: buy at least one good charger and always bring the Shogun’s AC charger with you (it is included in the kit).
8. Conclusions:
Clearly, the Shogun is an outstanding (but not perfect) product. While it is very light (a mere 16 ounces without batteries), which is great when used on a monopod or gimbal, it is also very fragile. Our monitor broke during our second on-location shoot and we always take great care of our gear.
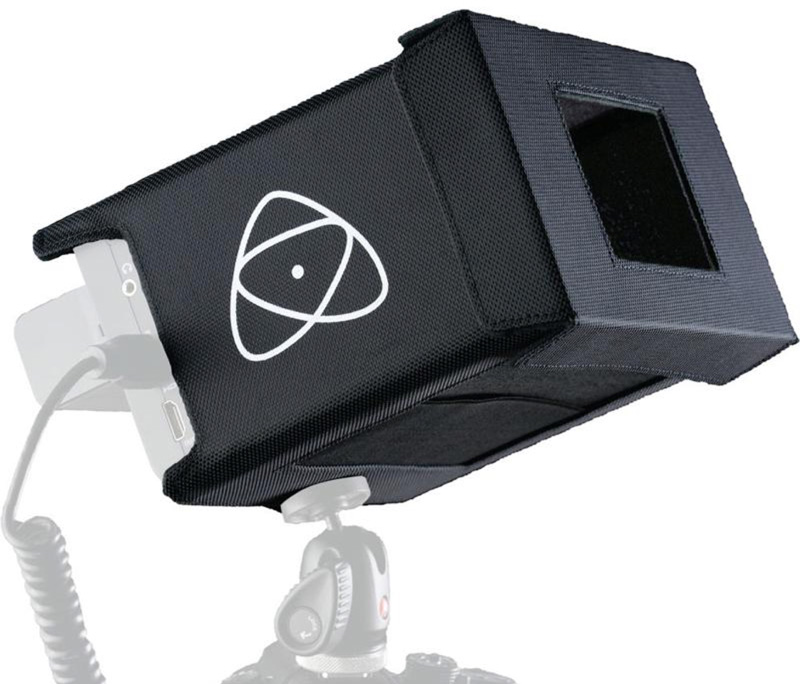
If you are planning to use the Shogun in broad-daylight I’d also STRONGLY recommend getting a sun hood, which was NOT included with our original kit.
There are at least a couple of additional features we haven’t tried yet: the optional Wi-Fi Remote Control to start/stop recording from an iOS or Android device, and flagging the footage on the Shogun as favorite/reject. Apparently this gets exported within the footage’s metadata and will work with Final Cut X and Adobe Premiere Pro CC. I can definitely see this as a time-saving feature, especially while working on interviews and marking sections with the best takes or sound bites.
For a couple grand, I believe one gets a LOT of value out of this device, especially if you can get the current deal that includes two FREE Solid State Drives.
Comments? Questions? Let’s chat on Twitter.
Video
Dove’s Sketches.
As a producer I’m always looking for great stories by real people and meaningful messages. As a filmmaker I appreciate nice lighting, clean sound, interesting framing and editing and overall high-production values. Dove’s latest video for their “Real Beauty” campaign checks everything on my list.
The 3-minute video is called “”Real Beauty Sketches” and it’s about a police sketch artist comparing with drawings how women describe themselves and how they are described by others.
The campaign has been going on for almost 15 years, sometimes with lots of controversy, sometimes with great success. The “Sketches” video won the Titanium Grand Prix at Cannes.