Video
Is a $350 ND filter three (and a half) times better than a $100 one?
For a long time I’ve been using a Genus Variable Neutral Density (77 mm) filter with my Canon and Sigma lenses and a Metabones Speedbooster Adapter on a Panasonic GH4.
Since I recently got a couple of Panasonic Lumix lenses with a 58mm filter, it was time to buy another ND. I was originally planning to get a Genus or Tiffen filter (about $100 on Amazon), but noticed a $350 Heliopan, among many other cheaper options.
Would the Heliopan (costing three times as much as the Genus) be three times as good as the Genus? The only way to answer this would be getting one, doing a few non-scientific tests, and look at the images side-by-side. So that’s what I did.
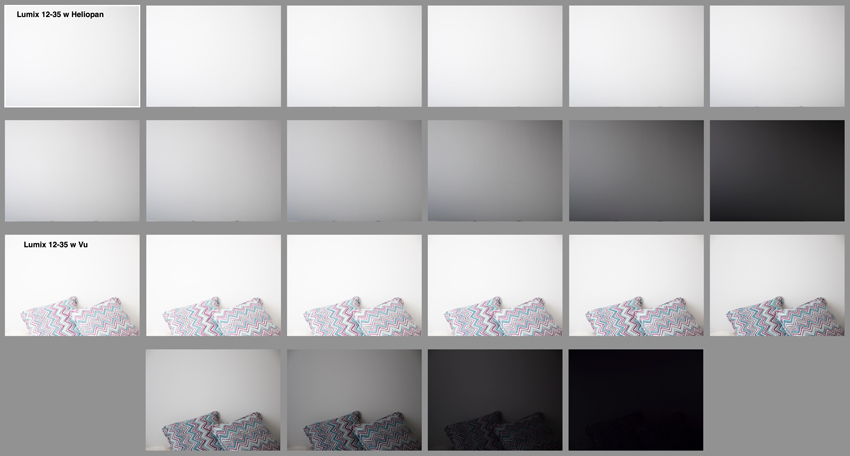
All the tests where performed with a Panasonic GH4 on a tripod, pointed to the same wall, with diffused available light, within a 30-minute period. So, even though that light might change a bit I don’t think it is a significant factor to see the drastic differences below. Here are the most meaningful tests:
Lumix 12-35mm f2.8 at 35mm (70mm equivalent) with Heliopan Variable ND

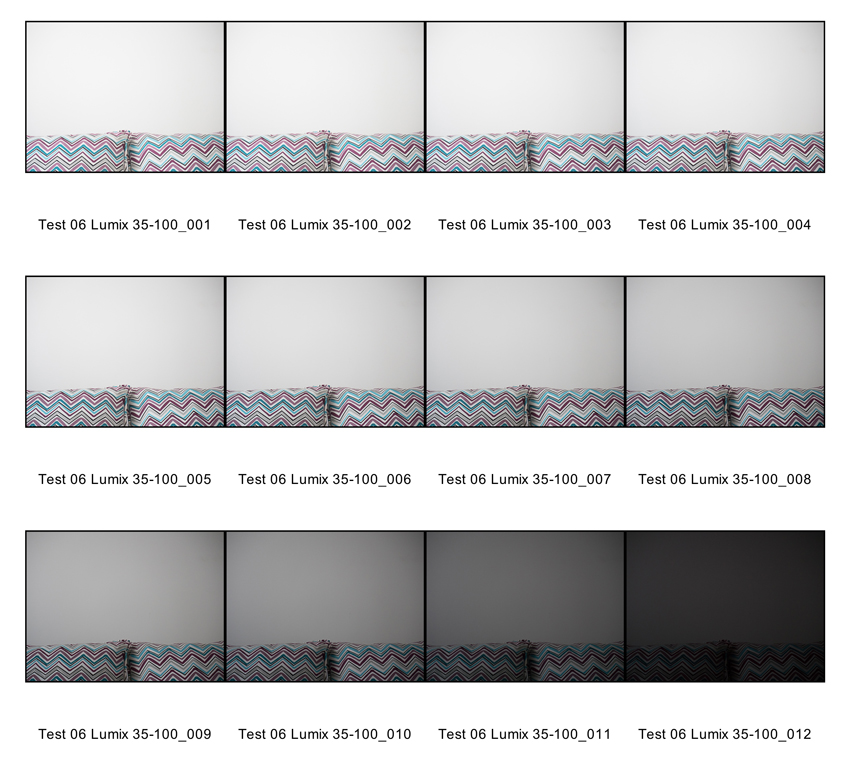
Lumix 35-100mm f2.8 at 35mm (70mm equivalent) with Heliopan Variable ND
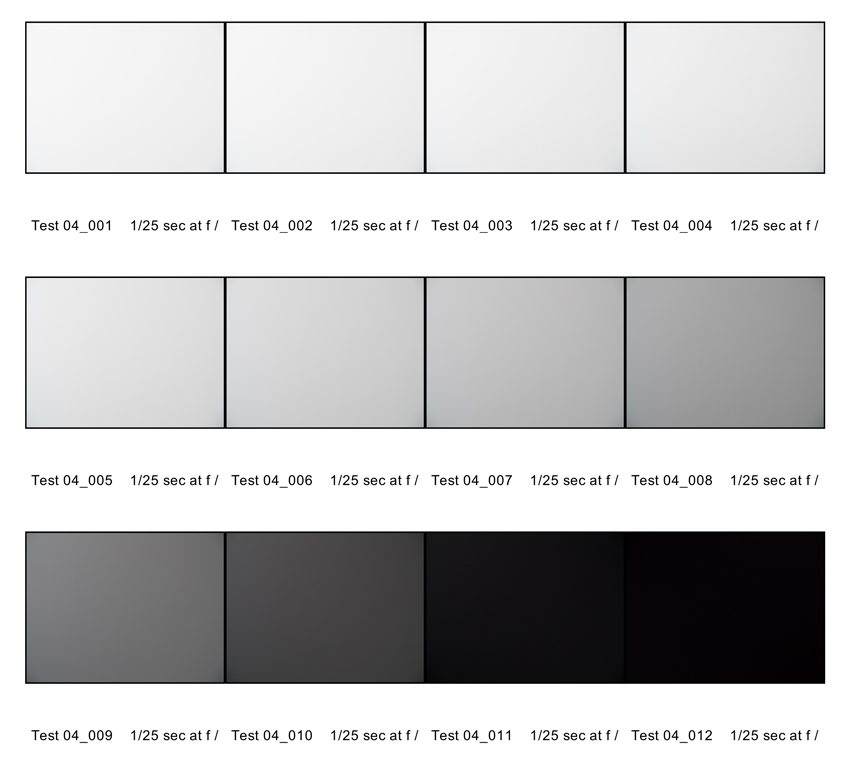
Canon 70-200mm f2.8 at 70mm with Genus Variable ND
Wow! What a difference between the Genus and the Heliopan! The first one is not only $225 cheaper, but the vignetting wasn’t as noticeable.
At that point I started wondering how much of that nasty vignetting was created by the lens and NOT by the ND filter. So I brought the widest Canon lens I had available a 24mm f1.4, and did another test.
Canon 24mm f1.4 at f2.8 with Genus Variable ND.
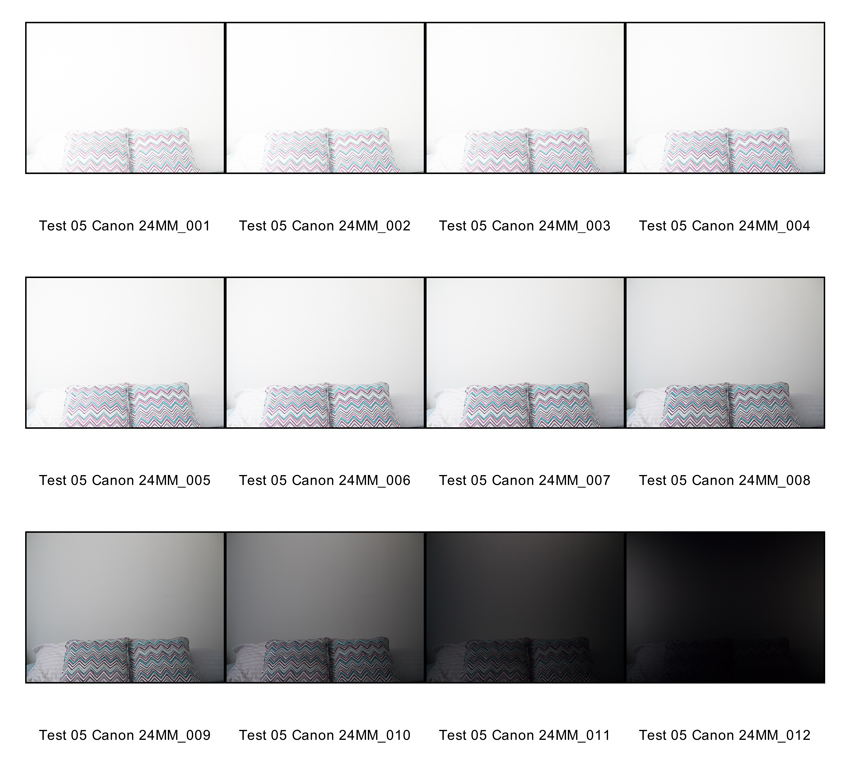
I was at a loss. There was some vignetting after drecreasing 4 stops, but never nearly as bad a the Heliopan on the Lumix lenses.
So the next step was to compare the Lumix 12-35mm f2.8 at 35mm (70mm equivalent), the Lumix 35-100mm f2.8 at 35mm (70mm equivalent), and the Canon 70-200mm f2.8 at 70mm WITHOUT any filters!
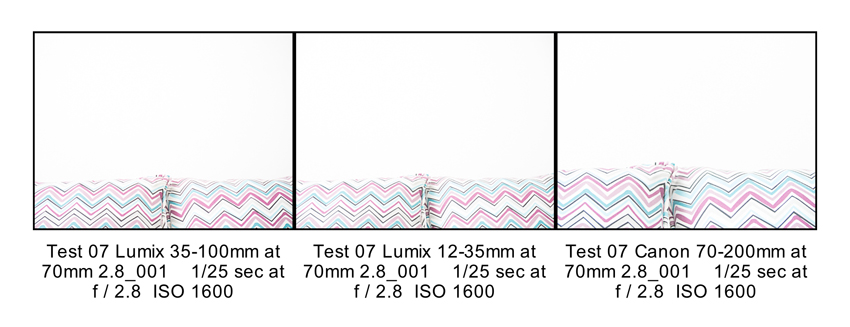
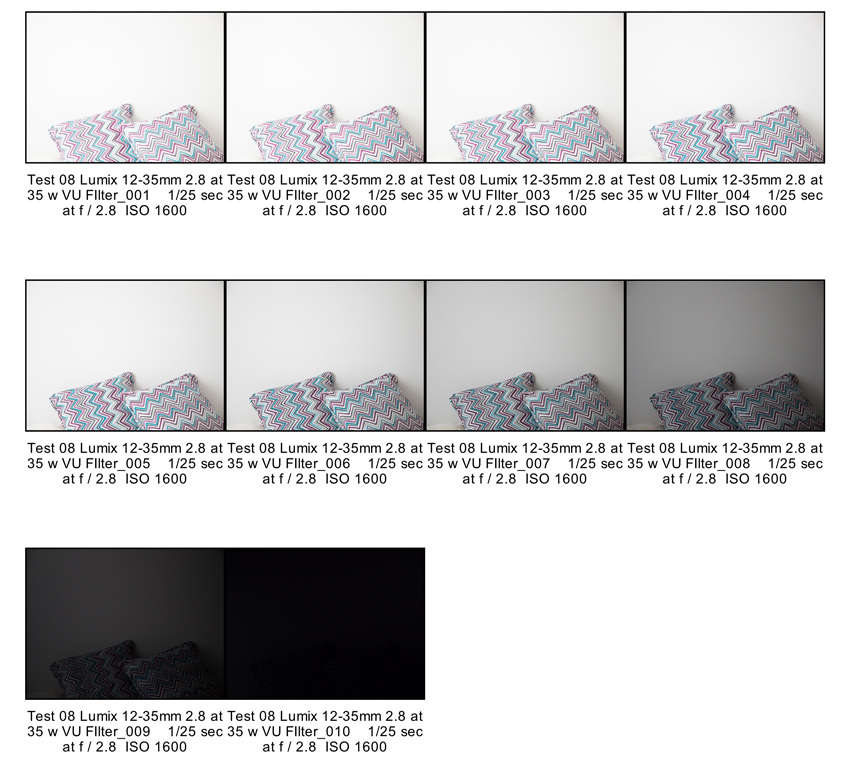
I didn’t see any issues or major differences between the Panasonic and Canon lenses, so I concluded that the Heliopan Variable ND filter was causing the vignetting issue. I returned the Heliopan and got a Vu Variable ND filter for my Panasonic lenses. Here are the results:
Lumix 12-35mm f2.8 at 35mm (70mm equivalent) with Vu Variable ND
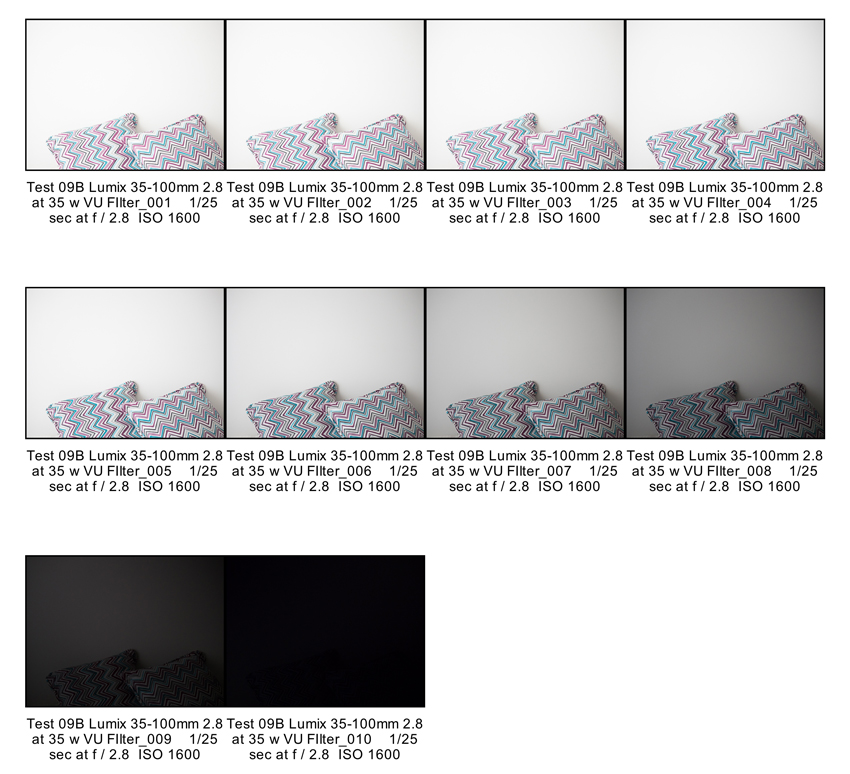
Lumix 35-100mm f2.8 at 35mm (70mm equivalent) with Vu Variable ND
Lumix 12-35mm f2.8 Lens – Heliopan vs. Vu side-by-side
Lumix 35-100mm f2.8 Lens – Heliopan vs. Vu side-by-side

• Conclusions
None of this filter + lens combination is perfect. All the filters create some sort of vignette. After putting all the tests side by side, I picked the ones with a) the LEAST amount of vignetting and b) the smoothest transition between one stop and the next one. Based on my won non-scientific experiments, with MY lenses, camera, computer, software, firmware, etc and only with one (somewhat) constant lighting scenario, the $102 Genus and the $125 Vu seem far superior than the $350 Heliopan.
Are you planning to buy one of these filters? Support upcoming tests and articles by using these links: Genus, Heliopan, Vu.
Did you find this article helpful? Please check out these online courses where I cover other essential filmmaking tools and techniques. Enjoy!
Video
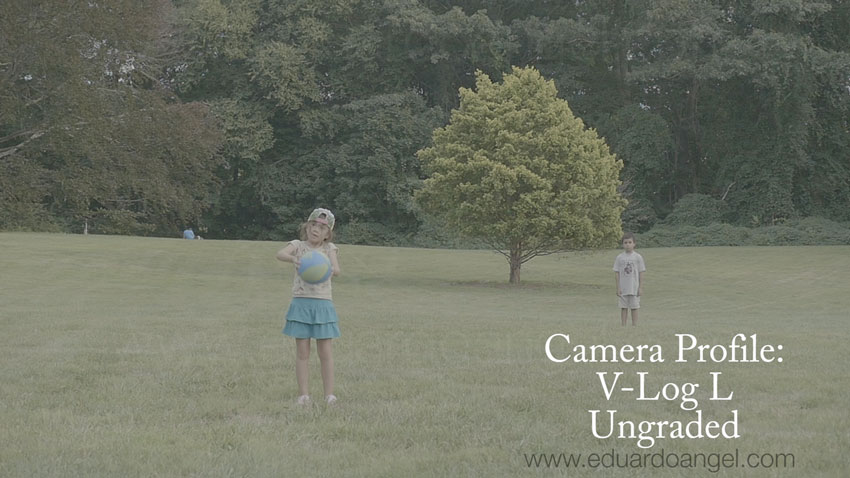
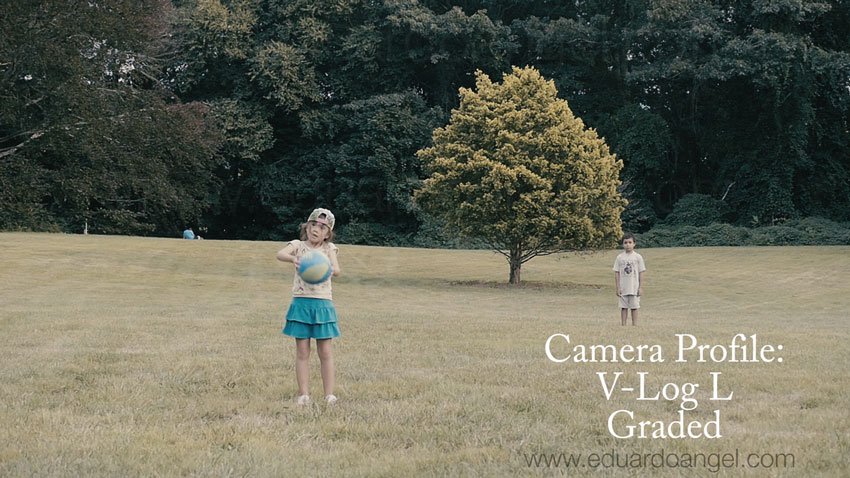
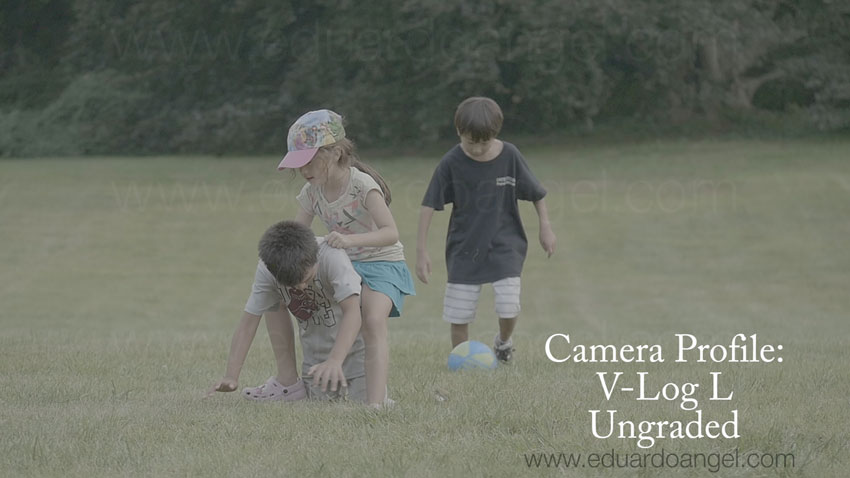
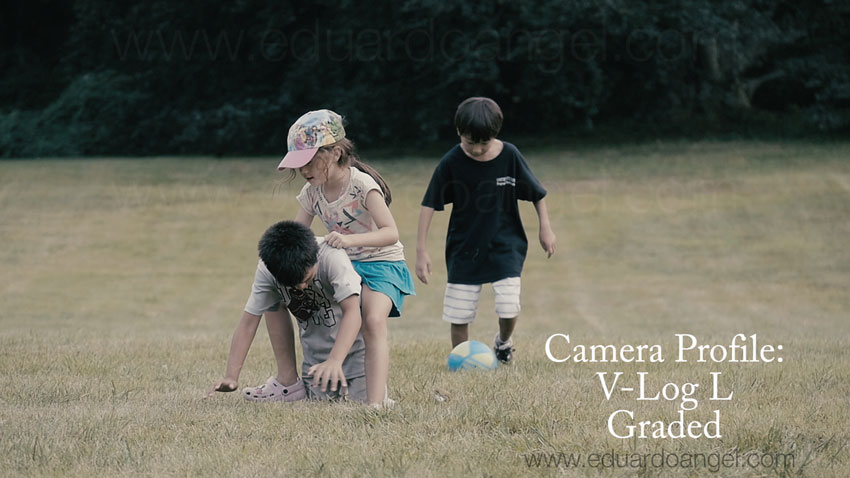
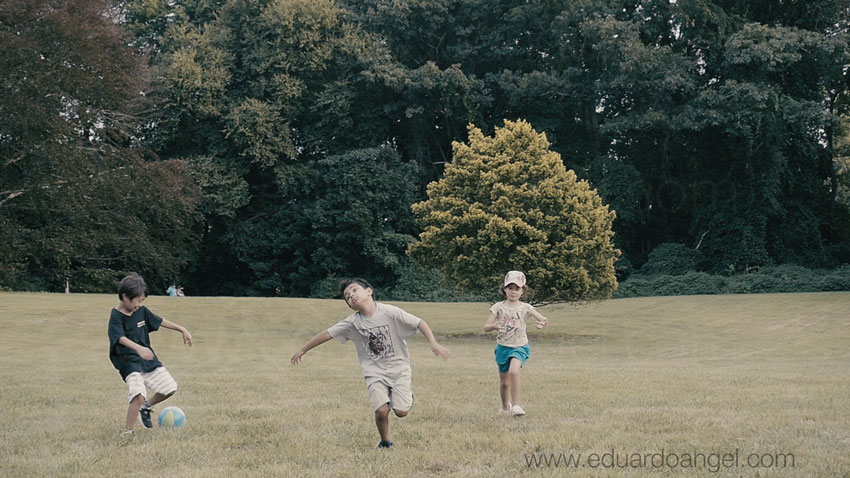
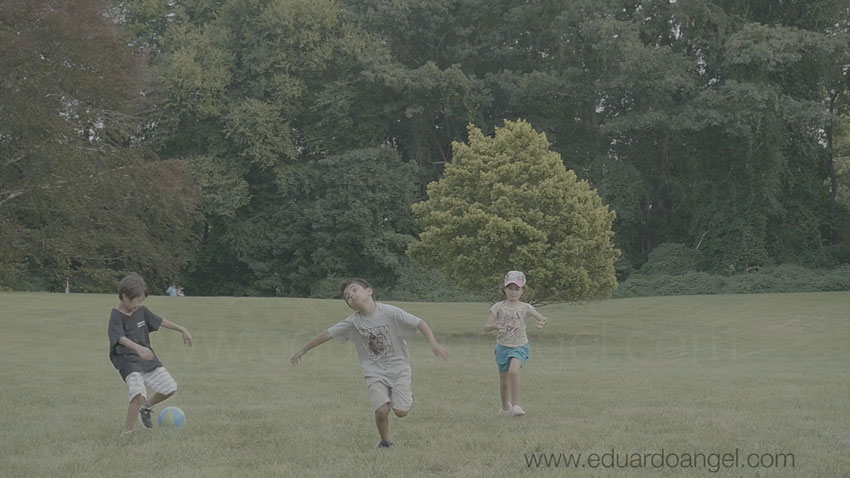
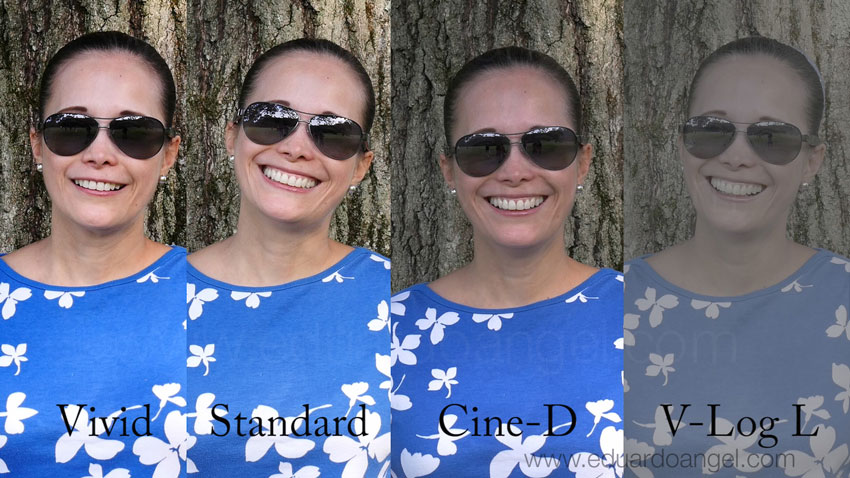
The Panasonic GH4 V-Log L. Graded and Ungraded Samples.
A few tests comparing the Panasonic GH4’s default camera profiles with the brand new V-Log L.
The (very quick) grading was done on Premiere Pro CC 2015 and the super awesome Lumetri Color Engine.

Why is V-Log important? Why should we care about camera profiles and external recorders? Read this and watch this to learn more.
Installing V-Log L on your GH4 is far from intuitive and user friendly, but we’ve got you covered. A complete step-by-step tutorial is available for free right here.
The GH4 firmware update (version 2.3) including V-Log L will cost $100, and it will be available in 2 weeks. You can pre-order it now right here.
Related Posts
- Hybrid Assignments Equipment List: The Essential 41 Items.
- The eternal quest for “the best” digital camera.
- Shooting Anamorphic and V-Log with Panasonic’s GH4. Valuable Lessons.
- 7 things we discovered after shooting 4K with the GH4. You won’t like #4.
- The Pros and Cons of external recorders: Atomos Shogun.
- 4K video under $2K. Meet the Panasonic Lumix GH4.
- I Just Got a Panasonic GH4 – Now What? Hard Drives.
- I Just Got a Panasonic GH4 – Now What? Batteries.
- I Just Got a Panasonic GH4 – Now What? Memory Cards.
Video
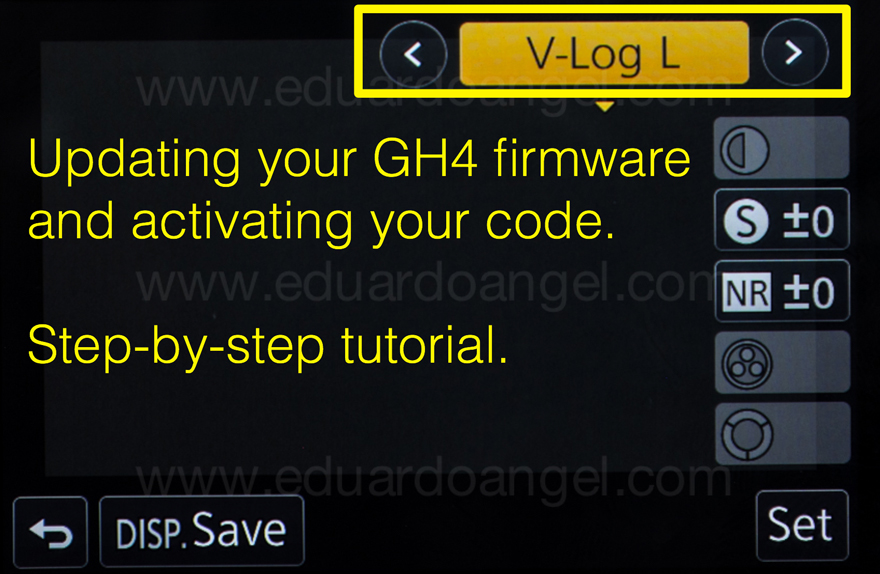
The Panasonic GH4 V-Log L is out! Step-by-step installation tutorial.
While the first steps to update the firmware to version 2.3 (which now FINALLY includes V-Log L) are the same as before, there are many new ones. I just installed the firmware myself and found the original instructions too confusing, so I rewrote the steps, captured screen shots and the camera’s menus hoping to save you some valuable time. I’m not a Panasonic employee, and I’m not being paid by anyone to write this post. If you have further questions or issues please contact Panasonic Tech Support directly. The link to purchase the firmware is here.
To watch a comparison between the default GH4 profiles and the V-Log L watch this video.
Ready? Let’s go!
Step A – Updating the camera’s Firmware.
- Prepare a fully charged battery and a blank SD card.
- Download the firmware version 2.3
- Extract the zip file and copy the firmware (xxx.bin) to the SD card.
- Insert the SD card into a camera.
- Set the camera to P mode.
- Turn the camera ON
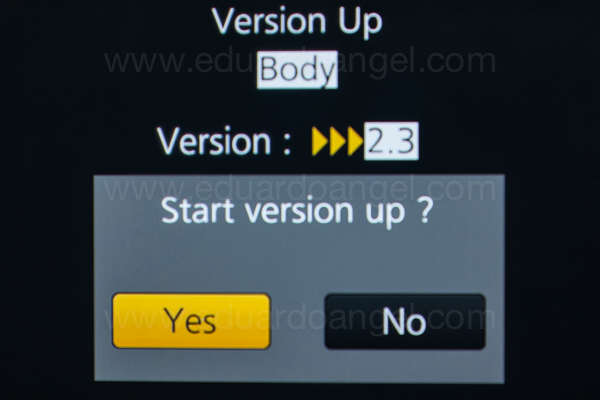
- Press and hold the playback button
- Select “YES” on the screen.
- The firmware update process only takes about 4 minutes.
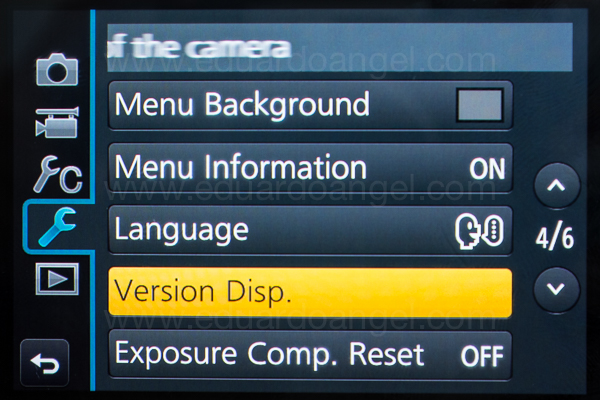
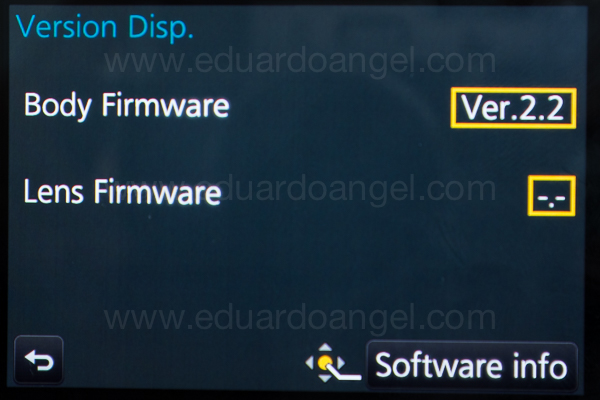
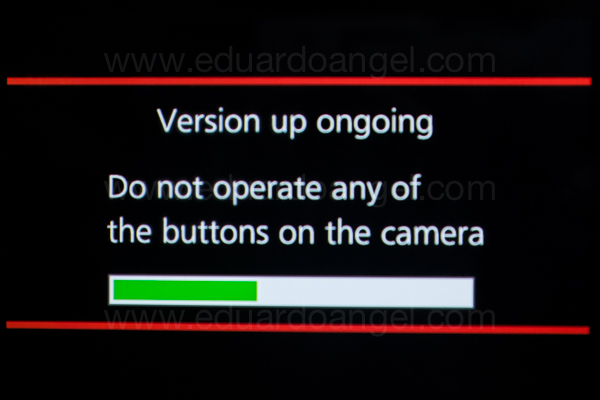
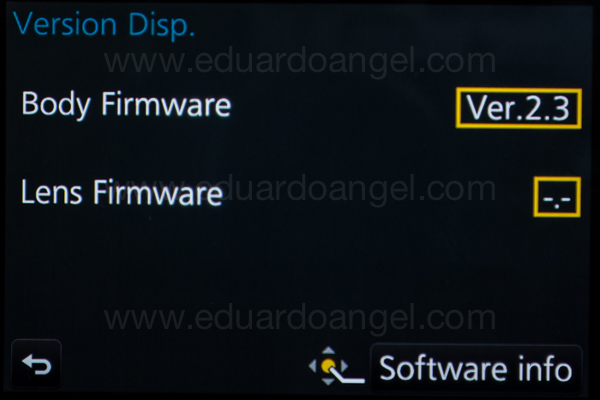
Turn the camera OFF and ON again, and check the firmware version

At this point, pretty much everything else is new.
Step B – Exporting the camera’s information
1. Insert (ideally another) formatted memory card into de camera
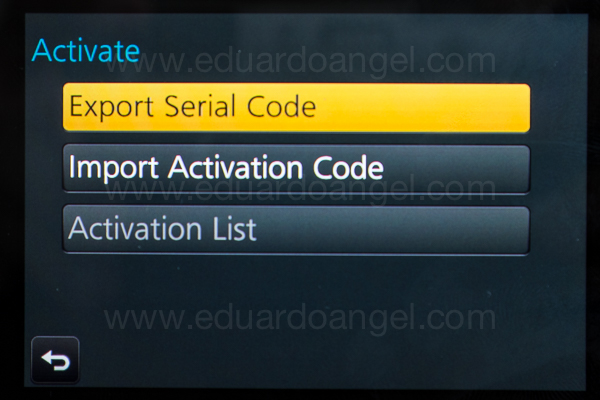
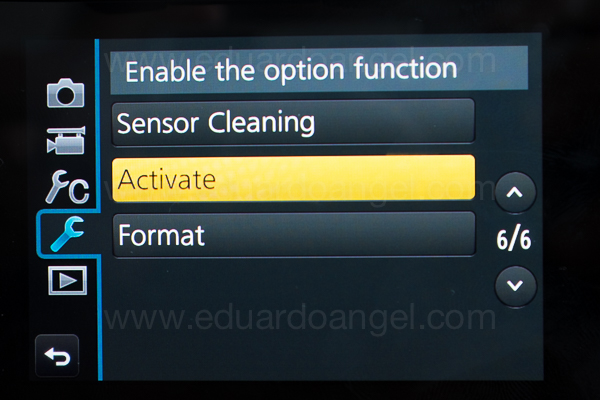
2. Select the menu:

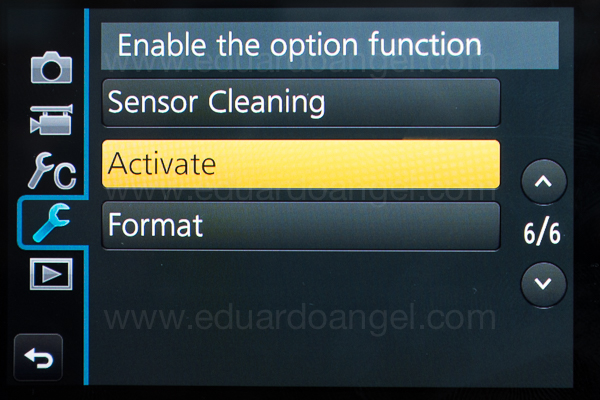
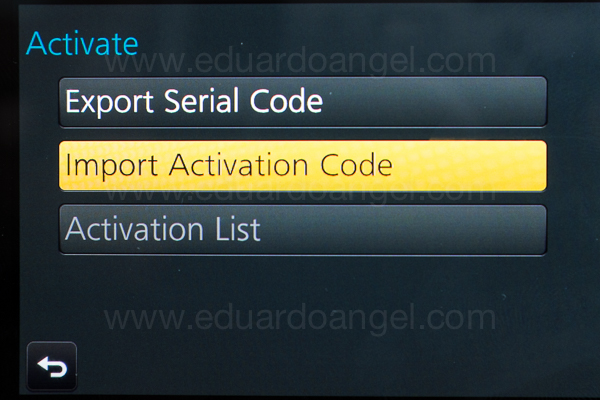
3. Select EXPORT SERAIL CODE and then press MENU/SET
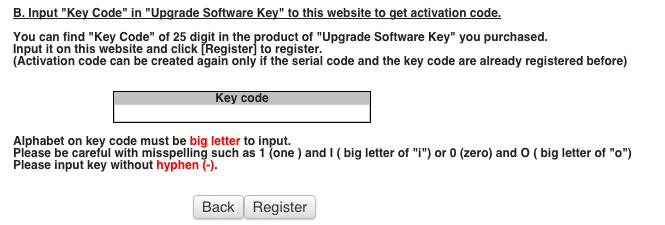
Step C – Acquire the Activation Code
1. Insert the SD card into your computer’s card reader. The computer must be online.
2. On your browser, paste the provided URL.
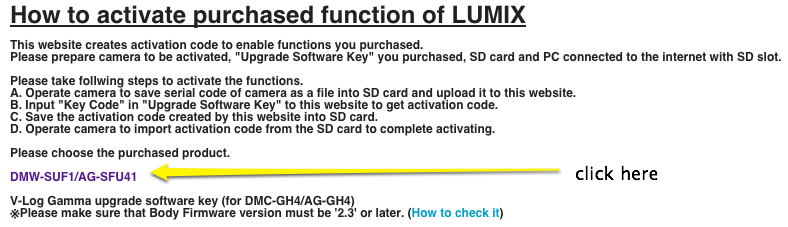
3. Click on DMW-SUF1/AG-SFU41
Then:
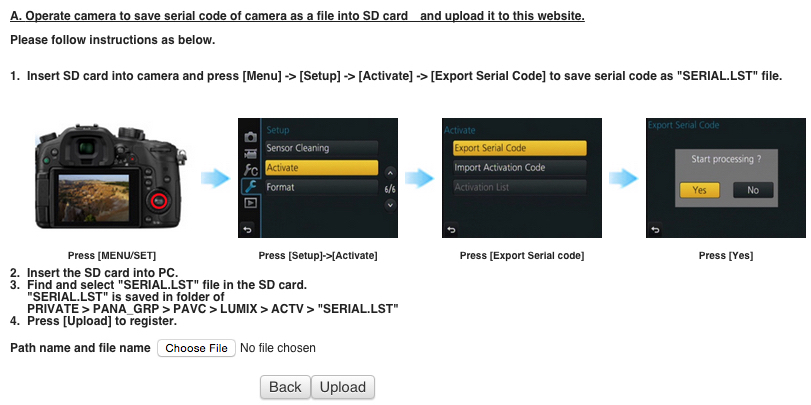
Follow this path to select the .LST file and click upload

Then:
Then:
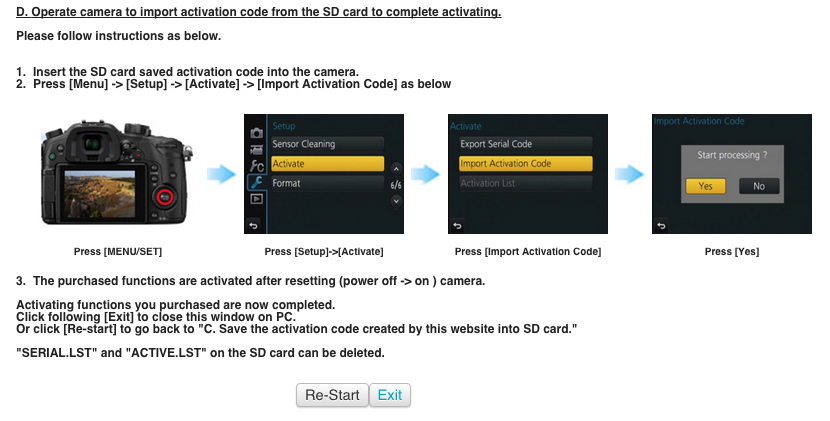
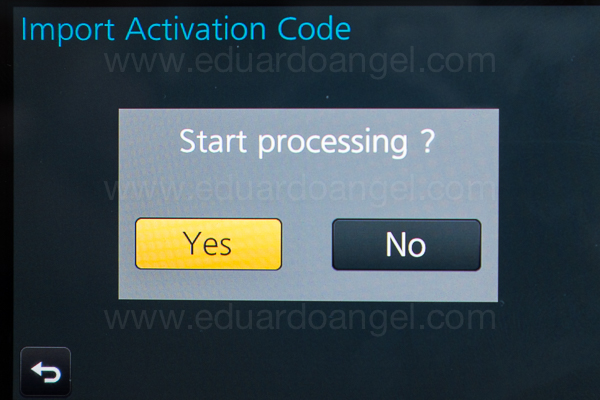
Step D – Import the Activation Code
1. Select the menu

2. Select “IMPORT Serial Code” and press MENU/SET

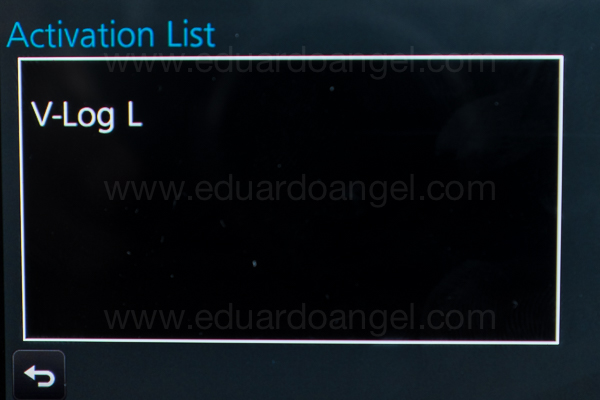
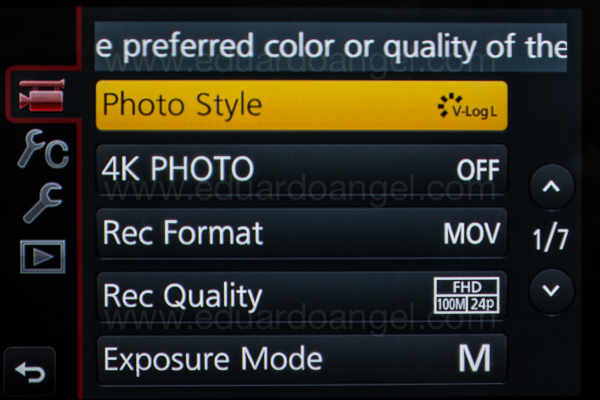
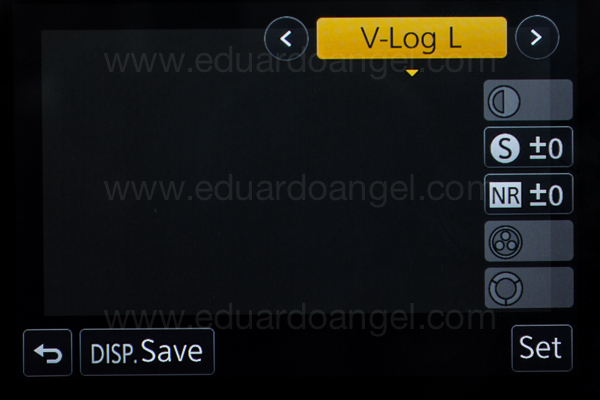
3. Turn the camera OFF and ON again. Switch to Motion Picture Mode, go to Photo Style, and Select V-Log L.
Something VERY important: While using the V-Log L profile the new base ISO is 400, not 200, so make sure to bring some ND filters along of you are shooting daytime exteriors.
The Panasonic GH4 V-LOG update can be purchased for $99 here by mid-September.
Happy Shooting!
Related Posts
- Hybrid Assignments Equipment List: The Essential 41 Items.
- The eternal quest for “the best” digital camera.
- Shooting Anamorphic and V-Log with Panasonic’s GH4. Valuable Lessons.
- 7 things we discovered after shooting 4K with the GH4. You won’t like #4.
- The Pros and Cons of external recorders: Atomos Shogun.
- 4K video under $2K. Meet the Panasonic Lumix GH4.
- I Just Got a Panasonic GH4 – Now What? Hard Drives.
- I Just Got a Panasonic GH4 – Now What? Batteries.
- I Just Got a Panasonic GH4 – Now What? Memory Cards.