Photography
How to Sync Catalogs with Adobe Lightroom 3.
Tuesdays Tutorials.
I am often shooting on location, and I need to make sure that my images are safe and properly backed up. I start by creating a temporary Lightroom catalog, usually with the client’s name. For this tutorial I am going to name it “Temporary Catalog TBD.”
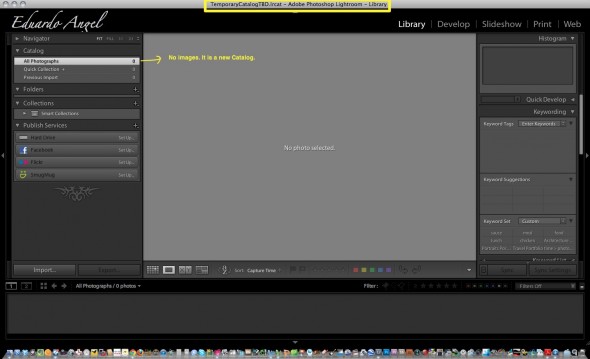
Click on Import and the Import dialog opens.
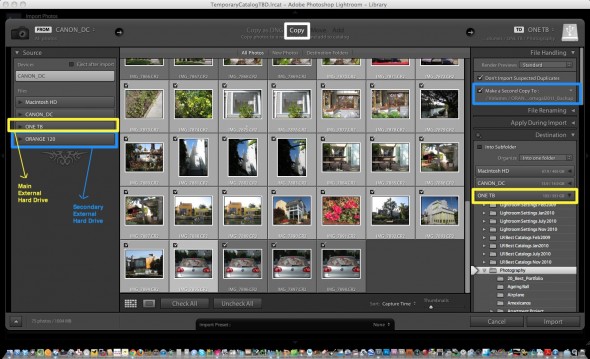
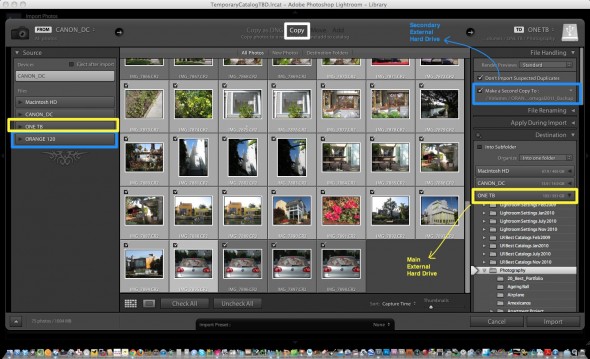
We can see that I have 2 external hard drives connected to my laptop, my MAIN external hard drive is called “ONE TB” and a SECONDARY external hard drive is called “ORANGE 120”.
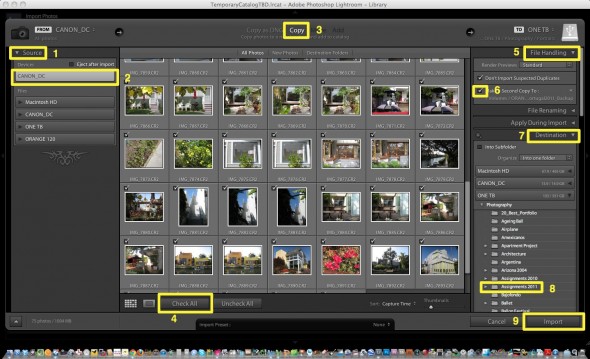
Take a look at the screenshot below:
1. Under SOURCE I specify where my images are, normally a memory card.
2. Verify that the memory card is selected.
3. Select COPY, which will copy, not move, the new photos from the memory card to the external hard drives. When importing from a memory card, Lightroom disables the “move” and “add” options as a safety measure. This is a good thing!
4. I normally jump to the bottom and select “check all” to make sure I am importing all the images. You can also pick and choose which images you want to import. Cool tip: the library shortcuts will work here as well: press E to see a large individual image and G to see the grid of images.
5. Under “File Handling” make sure that “Make a Second Copy to” is selected (step #6 on the screenshot). Here I select my SECONDARY external hard called “ORANGE 120”.
7. Under Destination, select the MAIN external hard drive (called “ONE TB”) and either choose an existing folder (step #8) or create a new one. To create a new folder you can “right-click” or “control + click” on this area.
9. Hit IMPORT.
We have downloaded all the images from the memory card into TWO different external hard drives. I can now add keywords, captions, enhance my images, etc.
Back at the Studio:
I want to add the images I shot on location WITH all the changes I made, to my permanent Lightroom Catalog.
Technically speaking, I will need to import the temporary catalog residing on the MAIN external hard into my permanent Lightroom Catalog. This permanent catalog can be an internal or external hard drive. If everything goes well, we won’t need our SECONDARY external hard drive, but it is good to have that added layer of safety.
1. Open your temporary catalog. In this case “Temporary Catalog TBD.”
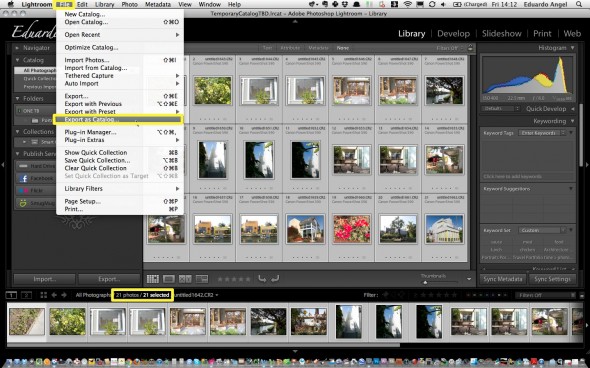
2. Make sure all the images you want to export (in this case 21 images) are selected.
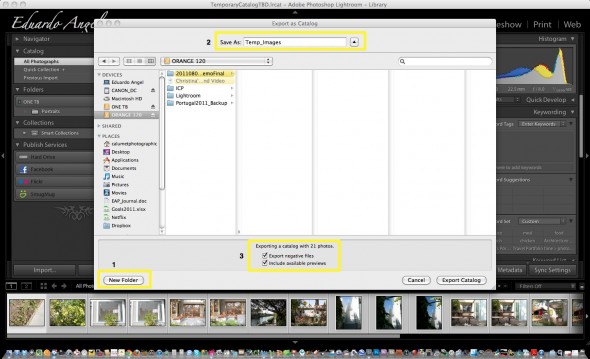
3. Go to File, and select “Export as Catalog”.
Select any hard drive you have available. The only thing that matters is that it has enough space for all the images.
Give it a name, it doesn’t really matter how it is called, since this is a temporary step.
For this tutorial I’ll call it ” demostuff”.
If you have created virtual copies, make sure that “export negative files” as well as “include available previews” are checked.
I have these settings enabled by default. The number of images should match what I selected on step 2 (21 images).
Quit the temporary Catalog.
Open you permanent Catalog.
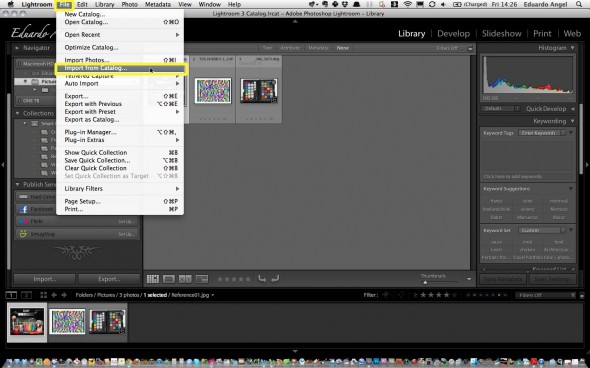
Choose File, and select “Import From Catalog“.
This step is critical:
Locate the folder where the temporary catalog we just created is, in my case “demostuff”.
Inside that folder, locate the .LRCAT file, select the FILE, not the folder, hit choose. Somehow most people miss this step.
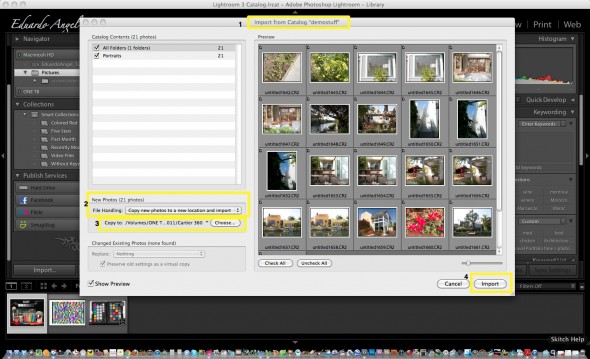
1. A new import dialog opens, and show display our 21 images.
2. Since I want copy all the new images with all the Lightroom changes and adjustments to my permanent Catalog select “COPY new photos to a new location and import“.
3. Either choose an existing folder or create a new one. To create a new folder you can “right-click” or “control + click” on this area.
Done. We have now consolidated the temporary Adobe Lightroom 3 catalog created on location, with the permanent catalog in our office or studio.
To learn more, go to “Tutorials” and use the password “tutorials” to download more FREE educational content. If you have any questions, feel free to comment below.
